
This article contains affiliate links. As an Amazon Associate I earn from qualifying purchases.
Safe Non-Slip Cutting Boards for Seniors (2026 Guide)
⭐ Introduction
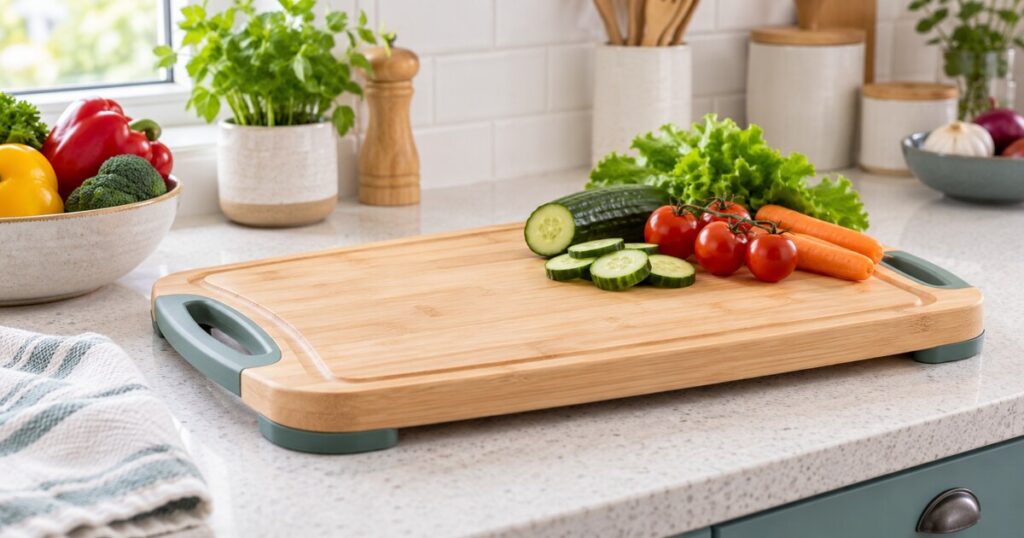
As people age, common kitchen tasks like chopping vegetables or slicing bread can become risky due to limited mobility, arthritis, or weaker grip strength. A slipping cutting board combined with a sharp knife is a real hazard. That’s why seniors—and their caregivers—should consider safe, non-slip cutting boards as a must-have kitchen upgrade. These boards are designed for stability, comfort, and easy cleaning, offering both safety and independence to elderly users. This guide highlights the best options available in 2026, listed for comparison; check the current seller listing before buying and ideal for aging hands.
Disclosure: This article contains affiliate links. If you purchase via our links, we may earn a small commission—at no extra cost to you.
📎Comparison Table: Safe Non-Slip Cutting Boards for Seniors
| Product | Type | Key Features | Why | Buy it now |
|---|---|---|---|---|
| Epicurean All-in-One Cutting Board | Composite | Non-slip feet; knife-friendly; dishwasher-safe | Everyday use | |
| San Jamar Saf-T-Grip Cutting Board | Plastic | Corner grips; commercial-grade; dishwasher-safe | Seniors with shaky hands | |
| Architec Gripperwood Cutting Board | Rubberwood | Embedded non-slip feet; rustic style | Those who prefer wooden boards | |
| Lanties Adaptive Cutting Board | Bamboo | Food spikes; side guard; non-slip base | One-handed or stroke survivors | |
| Hi-Soft Rubber Cutting Board | Rubber | Soft; stable; absorbs shock; easy on wrists | Arthritic or sensitive hands | |
🔍 Detailed Reviews
1. Epicurean All-in-One
Made from eco-friendly composite, this board is dishwasher-safe, durable, and won’t dull your knives. Its non-slip silicone feet and juice groove make it both practical and safe.
- Pros: Lightweight, heat-resistant, knife-friendly
- Cons: May stain with heavy use
2. San Jamar Saf-T-Grip
This commercial-grade plastic board includes molded rubber corners to prevent slipping. NSF-certified and dishwasher safe, it’s ideal for seniors who value hygiene and traction.
- Pros: Professional quality, stable surface
- Cons: Slightly bulky
3. Architec Gripperwood
A beautiful rubberwood board with embedded non-slip feet. It gives a natural wooden feel while preventing slippage.
- Pros: Rustic design, sturdy build
- Cons: Hand wash recommended
4. Lanties Adaptive Board
Designed for one-handed use, this bamboo board includes food spikes and L-shaped guards to hold food in place, making it perfect for seniors recovering from stroke or amputation.
- Pros: Highly accessible, stable
- Cons: Limited for traditional slicing tasks
5. Hi-Soft Rubber Cutting Board
Favored in professional kitchens, this rubber board cushions knives while offering superior grip. Seniors with joint pain or arthritis will appreciate its low resistance surface.
- Pros: Silent, soft on hands, anti-slip
- Cons: Slight rubber smell initially
📚 Buying Guide
- Material: Choose rubber, composite, or bamboo for best balance of comfort and durability.
- Stability: Non-slip feet or rubber edges are a must.
- Cleaning: Dishwasher-safe options save energy and time.
- Weight: Lightweight boards are better for those with reduced strength.
- Adaptability: Look for adaptive features like food spikes for one-handed use.
❓ FAQ
1. Should seniors avoid glass cutting boards?
Yes. Glass is slippery and fragile—unsafe for elderly hands.
2. What is the best cutting board size for seniors?
Medium (12″x18″) is ideal—large enough for prep, small enough to handle.
3. Can these boards go in the dishwasher?
Dishwasher safety depends on the exact model; check each maker’s care instructions, which requires handwashing.
4. What makes a board “adaptive”?
Features like food spikes, one-handed barriers, and rubber grips are designed to help those with limited mobility.
5. Are rubber boards better than plastic?
For seniors with joint pain, rubber offers a softer, quieter surface that’s easier on hands.
Test a Cutting Board Where It Will Be Used
A board that grips in a product photo may still move on a particular countertop. Put it on a clean, dry surface and press gently at all four corners before cutting. If the feet do not sit flat, the board rocks, or the counter is wet, choose a more stable setup. Test again after washing: worn feet and warped boards can change how securely they rest.
For someone using one hand, check whether the food holder can be loaded and cleaned without touching sharp spikes. A caregiver can set up ingredients in advance. Choose a size that leaves room for both the ingredient and the knife, yet is light enough for the cook to move without strain. A board that must be stored on a high shelf is unlikely to help in daily use.
Cleaning and Food Separation
Keep a separate board for raw meat, poultry or seafood and another for foods eaten without further cooking. Wash the board and nearby work area after handling raw ingredients. Follow the specific board maker’s care instructions; a material name alone does not establish whether that model belongs in a dishwasher. Replace a deeply grooved or unstable board instead of assuming cleaning or a damp towel can restore its grip. See FoodSafety.gov’s four steps to food safety for the underlying food-handling guidance.
Match the Board to the Countertop, Not the Product Photo
Countertop material changes how a cutting board behaves. A smooth laminate, polished stone, textured tile, and stainless-steel work surface can each create a different amount of friction. Before settling on a board, place it in the exact area where most chopping happens. Apply light pressure near each corner and along the cutting edge. A board that twists when pressure is applied from one side may be frustrating for someone who cuts slowly or pauses often. Also check whether nearby backsplash seams, counter joints, or an uneven surface prevent the board from resting evenly.
Consider the whole work zone rather than the board alone. A stable setup needs clear counter space, good lighting, and enough room to keep the knife handle from reaching the counter’s edge. Avoid positioning the board beside a sink where splashes are frequent or next to a burner where a person may feel rushed. If the usual counter is too high or too low for a seated cook, a stable board will not solve the awkward working position. A caregiver can observe a normal meal-prep task and identify the location that requires the least reaching and turning.
Choose a Size With Working Room Around the Food
Board dimensions should suit the foods being prepared and the available counter, not simply the largest board that will fit in a cabinet. A small board can crowd a tomato, bread roll, knife, and trimmings into the same area, increasing the need to reposition items. A very large board can be hard to lift, wash, and store. Look for a cutting surface that leaves an open margin around the ingredient so the cook can guide the knife without working at the edge. That margin is especially useful when chopping foods that roll, such as onions, carrots, or round fruit.
Usable workspace also includes the board’s features. Wide handles, raised borders, grooves, rubber corners, and food guards can reduce the flat area available for chopping. Measure the clear central section if a person commonly prepares several ingredients at once. Someone who mostly slices a sandwich or portions soft fruit may prefer a compact board that stays within easy reach. Someone who transfers chopped vegetables into a bowl may benefit from a board with a clear path to the bowl. Test whether the board can be turned or slid into position without knocking other kitchen items aside.
Plan One-Handed Preparation Without Relying on Spikes
One-handed food preparation works best when food can be secured by a non-sharp feature and the task is simplified. A raised corner, low front lip, removable food guard, or shallow holder may keep a piece of produce from traveling across the board. These features are most useful when they hold food in a predictable position without making cleanup difficult. For example, a guard can help anchor a cucumber for slicing, but it may get in the way when mincing herbs. Select a design based on the foods the person actually prepares rather than assuming one adaptive feature suits every task.
Sharp holding spikes require particular judgment. They may be difficult to see, clean around, or avoid when reaching across the board, and they can be unsuitable for a person with reduced sensation, limited vision, or an unsteady hand. A safer routine may involve choosing pre-cut ingredients, using a fork to steady food only when appropriate, or selecting foods that stay put after being halved on a flat side. Caregivers should not assume that a specialized board removes the need for supervision during unfamiliar tasks. Begin with soft foods and a simple motion before attempting firmer produce or larger batches.
Keep Raw Ingredients Separate From Ready-to-Eat Foods
A practical board system makes food separation easy to follow on busy days. Assign one board to raw animal foods and another to produce, bread, cheese, or foods served without additional cooking. Color, a discreet label, or separate storage locations can help distinguish them, especially in a shared household. The goal is to avoid using a board that held raw chicken for a salad ingredient because it happens to be closest at hand. If space permits, choose boards with noticeably different shapes or edge colors so identification does not depend on reading small print.
The separation plan should include knives, utensils, and serving dishes. A clean cutting board does not help if a knife used on raw food is then used to slice a cooked item. Keep a clear dish or tray for uncooked ingredients, and move prepared foods to a separate clean plate. When a caregiver prepares meals, demonstrate the sequence from refrigerator to board to pan or bin. A consistent order reduces decisions: prepare ready-to-eat items first, then clean up, then handle raw ingredients. This routine may be more manageable than trying to sanitize a board mid-preparation.
Pair the Board With a Manageable Knife
The knife and cutting board function as a pair. A board that is very hard, very slick, or heavily textured can make knife control feel less predictable. Conversely, a deeply soft surface may catch a blade and make thin slicing harder for some users. Use a knife that feels controllable in the cook’s hand, with a handle that can be grasped securely without excessive squeezing. The knife should be appropriate for the task: a small utility knife may be easier to manage for strawberries or cheese, while a longer blade may be needed to cut a loaf without sawing near the fingers.
Sharpness deserves attention, but it is not a reason to rush into a new knife. A dull blade can require more force and may skid across a firm food, while an extremely sharp blade requires careful handling and storage. Have a knowledgeable person inspect existing knives and remove damaged or loose-handled ones from regular use. Practice with foods that offer little resistance, such as peeled banana, cooked potato, or soft cheese. If a board’s raised edge interferes with the knife’s path, choose a different board or alter the task rather than forcing the blade over an obstruction.
Treat Water and Worn Grip Parts as Daily Hazards
Water, cooking oil, condensation, and food scraps can undermine a board that usually feels secure. Before food preparation, wipe the counter dry and inspect the underside of the board. Pay attention to the rubber feet, edge grips, and the spaces around them, where grease can accumulate. A board may appear dry on top while moisture is trapped underneath after washing. If it shifts even slightly during a light press, remove it from use until both the board and counter can be cleaned and dried. Do not begin cutting in hopes that pressure from the food will stabilize it.
Grip components wear gradually, so changes can be easy to miss. Look for flattened feet, hardened rubber, loosened pads, cracked corners, or a board that no longer lies flat. Heat exposure and repeated dishwasher cycles may affect some materials or attached parts; follow the care directions provided for that particular board. A board that rocks or slides should not be treated as an acceptable backup for quick jobs. If replacement feet are available from the maker, confirm that they fit securely. Otherwise, replacing the board may be the simpler choice when stability has declined.
Build a Washing and Drying Routine That Is Easy to Complete
The best cleaning routine is one a person can complete without struggling to balance a heavy, slippery board at the sink. Clear the sink first, then wash the board with enough open space to control it. Holding a large board upright under running water can be awkward for a person with a weak grip, so a smaller board or a board with a useful handle may be more realistic. Clean both sides, the edges, handles, grooves, and non-slip components. Food residue around feet or grips can affect both hygiene and traction, even if the cutting surface looks clean.
Drying matters because boards stored while damp can leave moisture in cabinets and may be unpleasant to retrieve later. Use a stable drying rack or place the board where air can reach both sides. Avoid leaning a tall, wet board where it can slide down behind appliances or fall when a cabinet is opened. Once dry, inspect it briefly for warping, odor, cracks, and loose pieces before putting it away. If handwashing is difficult, prioritize a board whose stated care method fits the household’s actual equipment and habits, rather than relying on a material-based assumption.
Make Storage and Carrying Part of the Buying Decision
A board is only helpful if it can be retrieved and returned without awkward lifting. Consider its weight, thickness, handle shape, and storage location before choosing it. Thin boards may be easier to carry but can flex or feel difficult to grasp at the edge. Thick boards may offer a more substantial handhold yet be cumbersome for someone who has trouble lifting with both hands. A handle opening should be large enough for the user’s fingers and should not have a sharp edge. Test carrying the board from its storage spot to the counter while keeping the route clear.
Store frequently used boards between waist and shoulder height whenever possible. High shelves invite overhead reaching, while low cabinets may require bending and pulling the board from behind other items. A vertical rack can keep boards accessible, but only if it holds them upright without a board tipping onto the user’s hand or foot. Avoid stacking several boards together if separating them requires a strong pinch grip. In a caregiver’s home, label the designated everyday board and keep it near the preparation area, rather than storing it with rarely used specialty kitchenware.
Use a Caregiving Demonstration to Set Expectations
A brief demonstration can reveal obstacles that product descriptions cannot show. Ask the cook to complete a familiar task, such as slicing a banana, cutting a sandwich, or chopping a peeled vegetable, with the board placed in its intended location. Watch where the free hand goes, whether the board shifts during pauses, and whether the person needs to reach across the blade to move scraps. The purpose is not to test speed or independence. It is to identify where the task becomes awkward and decide whether a different board position, food choice, knife, or level of assistance would make more sense.
Keep instructions limited and repeatable. A useful sequence might be: dry the counter, set the board down, press its corners, place food in the center, keep fingers away from the cutting line, and clean the board after use. Written reminders in large print may help if the kitchen is shared, but they should not replace hands-on guidance. Revisit the setup after a few uses because a person may find certain features inconvenient once washing and storage are included. If cutting remains difficult or unpredictable, caregivers can handle the cutting portion while preserving participation in safer preparation steps.
Decision Checklist Before Adding a Board to the Kitchen
Before choosing a board, confirm that it rests flat on the household’s actual countertop and does not slide when pressed from multiple directions. Check that the clear cutting area fits the meals the person prepares, not just a single demonstration item. Determine whether the user can lift it, wash it, dry it, and store it without help when desired. Review the board’s care instructions, including the treatment of non-slip parts and any detachable accessories. If the board includes holders or guards, verify that they do not create difficult-to-clean spaces or block the knife during ordinary tasks.
Then consider how the board fits the household routine. Decide which board will be reserved for raw ingredients, where it will be stored, and who will inspect it for wear. Make sure the chosen knife can be used comfortably on the surface and that there is a stable place for bowls, scraps, and prepared food. Reject a board that is impressive in one area but creates a new problem, such as being too heavy to clean or too bulky for the available counter. A simple, consistently used setup is usually more practical than a feature-heavy board that stays in a cupboard.
Further reading: FoodSafety.gov: four steps to food safety National Institute on Aging: home safety.
🎯 Conclusion
Each of these boards offers a unique benefit for seniors—whether you need anti-slip safety, one-handed adaptability, or joint-friendly softness. The Epicurean board is a top all-rounder, while the Lanties board is a lifeline for those recovering from stroke. Give your loved ones the gift of safer cooking today.🛒 Explore More on Amazon
Related: Best Microwaves for Seniors | Safe Electric Kettles