
This article contains affiliate links. As an Amazon Associate I earn from qualifying purchases.
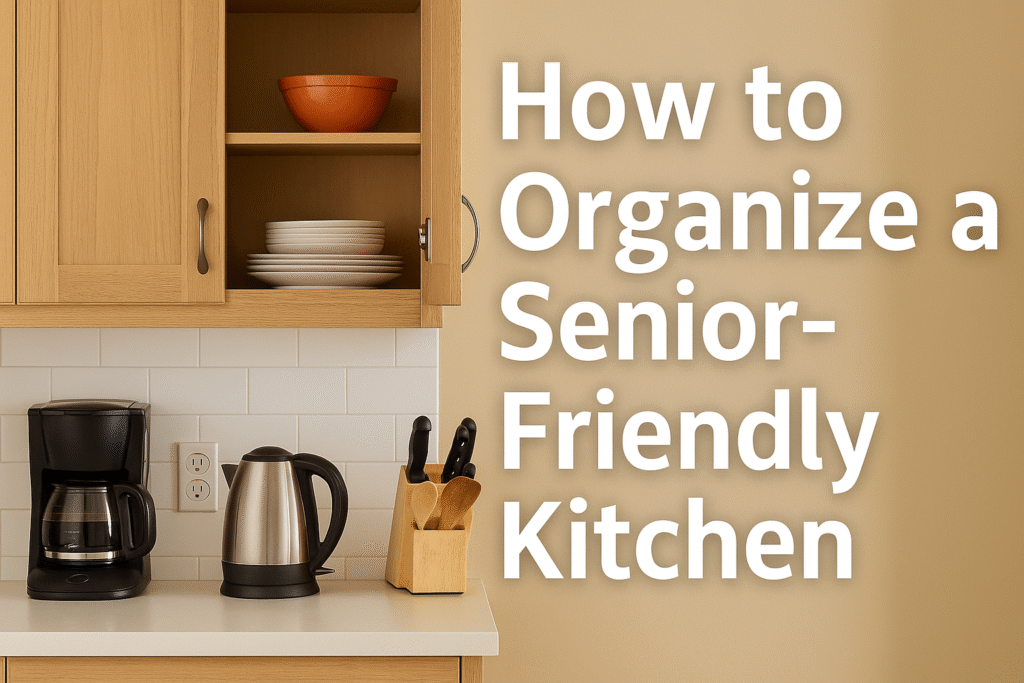
It’s 2026, and organizing a kitchen that’s truly safe, accessible, and easy to use for seniors is more essential than ever. As we age, tasks like opening jars, handling cans, and prepping meals can become more difficult due to weaker grip, slower reflexes, and reduced vision. Whether you’re a caring child wanting to help your parents maintain independence or a senior aiming to streamline your own kitchen routine, this guide will provide actionable steps on how to organize a senior-friendly kitchen.
Inside, you’ll find smart layout strategies, safety-focused tool recommendations, and curated Amazon-verified gadgets that make everyday cooking tasks simpler and safer.
Disclosure: This article contains affiliate links. If you make a purchase through them, we may earn a small commission at no extra cost to you.
1. Quick Comparison of Senior-Friendly Tools
| Product | Type | Key Features | Why It’s Great | Amazon |
|---|---|---|---|---|
| Otstar 5‑in‑1 Jar Opener (ASIN: B07QVWJ6VN) | Manual multi‑lid opener | Five lid sizes, rubber grip, no batteries | Easy twist for weaker hands | 🛒 Check Price on Amazon |
| Robotwist Electric Jar Opener (ASIN: B08779FHLS) | Hands‑free electric | One-touch, strong torque | No effort—ideal for arthritic grip | 🛒 Check Price on Amazon |
| Full Circle Smooth‑Edge Can Opener (ASIN: B0CMTWYBN6) | Manual safe-edge opener | Large knob, smooth cut rims | Prevents nicks and snags | 🛒 Check Price on Amazon |
| Jokari Ring‑Pull Can Opener (ASIN: B0020ML3UC) | Manual pull‑tab opener | Non-slip handle, protects nails | Great for canned foods | 🛒 Check Price on Amazon |
| Etac One‑Handed Cutting Board (ASIN: B07CFS3NX8) | Adaptive board | Spikes, fence, suction feet | Safe one-hand prep | 🛒 Check Price on Amazon |
2. Detailed Reviews of Each Tool
 Otstar 5‑in‑1 Jar Opener
Description: The Otstar 5-in-1 Jar Opener is a smart and affordable manual solution for seniors who struggle with opening jars and bottles of different sizes. Its ergonomic rubber grip and five-ring design provide leverage and control even for those with arthritis.
- Pros: Works with multiple lid sizes, no batteries, lightweight, easy for arthritic hands.
- Cons: Requires wrist movement—may challenge users with very limited strength.
- Best for: Seniors with mild to moderate grip seeking a versatile and compact daily helper.
 Robotwist Electric Jar Opener
Description: This countertop electric opener grips lids and removes them with a simple press—perfect for users with limited hand strength.()
- Pros: Fully hands-free, works across jar sizes.
- Cons: Needs counter space and batteries.
- Best for: Seniors with severe arthritis or minimal grip.
 Full Circle Smooth‑Edge Can Opener
Description: This manual can opener features a large ergonomic knob and leaves a smooth edge for safety.()
- Pros: Safe edge, dishwasher-safe.
- Cons: Requires manual turning.
- Best for: Seniors who prefer manual tools but need safety from sharp edges.
 Jokari Ring‑Pull Can Opener
Description: Designed for lifting ring-tab cans with minimal effort and no damage to nails.()
- Pros: Compact, protects fingers, dishwasher-safe.
- Cons: Only works on pull-tab cans.
 Etac One‑Handed Cutting Board
Description: This board enables one-handed prep with spikes and suction feet for stability—ideal for stroke survivors.
- Pros: Enables safe one-handed slicing.
- Cons: Large size, manual cleaning required.
3. How to Choose the Right Tools for Seniors
- Weak grip? Opt for electric like Robotwist or leverage-focused manual tools like Otstar.
- Poor eyesight? Use high-contrast handles for easier identification.
- Noise sensitivity? Choose quiet manual tools or silent electric openers.
- Safety first: Go with smooth-edge openers (Full Circle) to avoid cuts.
- One‑handed use: Use adaptive items like the Etac board or under-cabinet jar openers (see guide).
Additionally, keep frequently used tools within arm’s reach—no bending or stretching. Use drawers for heavy items, label containers with large fonts, and establish zones for prep, cooking, and cleaning.
4. Frequently Asked Questions
- Are these dishwasher-safe? Otstar, Full Circle, and Jokari are dishwasher-safe; Robotwist should be spot-cleaned.
- Will Robotwist damage lids? No—it opens lids cleanly and preserves their shape.
- Do these fit different jar sizes? Yes—Otstar fits five sizes, Robotwist covers a wide range.
- Are they worth the cost? For senior independence and safety, absolutely worth it.
- Where should I store them? Place manual openers in lower drawers, Robotwist on countertop, cutting board near prep area.
Organize by the Steps of One Familiar Meal
Choose a meal the person cooks regularly and follow each step from storage to washing up. Keep everyday ingredients near the preparation area, with lightweight dishes at an easy reach height. Put heavy pots on a stable lower shelf or in a drawer that does not require deep bending. Keep a clear section of counter next to the refrigerator and a heat-safe landing area beside the stove or microwave. These changes usually help more than buying another single-purpose opener.
Ask the cook which items they want to keep where they already are. Move one category at a time and use clear, high-contrast labels if they help. If a new system forces the person to search for familiar tools, revise it together. Remove duplicates and expired ingredients while maintaining the user’s preferred meal routine.
A Practical Weekend Reset
- Clear a walking route and check that cabinet doors open without blocking it.
- Group the tools for breakfast, drinks and main meals near their use areas.
- Test lighting over the cutting board, sink and controls.
- Use one common meal to check whether the new storage places reduce reaching and carrying.
- Revisit the arrangement after a week and adjust anything that feels less convenient.
Keep towels and paper away from hot surfaces; see U.S. Fire Administration cooking guidance.
Map the Kitchen Around Real Meals
Start with two or three meals the household actually makes, rather than arranging cabinets according to an idealized kitchen plan. For example, trace the steps for oatmeal, a sandwich, soup, or a favorite pasta dish. Note where the ingredients begin, where they are prepared, which appliances are used, and where dishes are set down afterward. This reveals unnecessary crossings of the room, repeated bending, and moments when a person must carry something hot or heavy. A workable layout supports familiar habits instead of requiring a senior to memorize a completely new routine.
Create small meal stations only when they reduce steps. A breakfast station might include cereal, mugs, tea, a lightweight bowl, and a spoon near the place where breakfast is made, while a simple lunch area may hold plates, shelf-stable foods, and food-storage containers. Avoid overfilling these areas; too many choices can make the most useful items harder to locate. Caregivers should ask before relocating personal favorites. An arrangement is more likely to last when it reflects the cook’s routines, handedness, and preferred sequence of tasks.
Make the Refrigerator-to-Counter Route Easy
The route between the refrigerator and the main work surface deserves special attention because it is used repeatedly throughout the day. Keep the counter space beside the refrigerator as clear as possible so groceries, milk, leftovers, and produce have a stable place to land. Do not use that area as permanent storage for mail, decorative appliances, or stacked containers. A clear landing spot reduces the need to balance items in one hand while opening a drawer or moving other objects out of the way.
Consider what happens after food leaves the refrigerator. Commonly used cutting boards, bowls, measuring tools, and food containers should be available without walking across the kitchen or reaching above shoulder level. If the refrigerator door opens into a narrow passage, move nearby furniture, bins, or rolling carts that could create a pinch point. Check the route while carrying an empty pot and again with a filled pitcher; these simple tests can expose awkward turns, low handles, or surfaces that invite clutter.
Set Daily Items Within a Comfortable Reach Zone
Reserve the easiest-to-reach storage for objects used every day: drinking glasses, everyday plates, favorite pans, utensils, medications that are normally kept in the kitchen, and frequently used pantry staples. For many people, the most manageable zone is between about knee height and shoulder height, without deep bending, tiptoe reaching, or leaning far into a cabinet. Exact placement should follow the individual’s mobility and whether they usually sit or stand while preparing food. Items used only occasionally can occupy less convenient shelves.
Weight matters as much as height. A large mixing bowl may be light enough for an upper shelf, but a stack of dinner plates, a Dutch oven, or a full canister may not be. Store heavier cookware in a drawer or on a shelf where it can be slid forward rather than lifted down from above. Limit stacks so that removing one item does not require lifting several others. If a cabinet shelf is deep, place everyday objects toward the front and less-used supplies behind them.
Decide Whether the Problem Is a Tool or the Storage System
Before adding a specialized kitchen aid, identify the exact point where the task becomes difficult. A jar may be hard to open because the lid is tight, but it may also be stored too high, handled over a slippery counter, or surrounded by clutter that leaves no room for a stable grip. Similarly, a heavy pot may be challenging because of its weight, yet moving it closer to the stove may remove the most difficult carrying step. Storage changes can sometimes solve the larger problem.
Tools are most useful when they address a remaining barrier after the workspace is organized. Keep only the aids that the person understands, can retrieve easily, and is willing to use. A device stored in a crowded back cabinet is unlikely to help during a rushed meal. Give each frequently used tool a consistent home near the relevant task, with enough surrounding space to grasp it comfortably. If an item creates extra setup, cleaning, or batteries to manage, weigh that burden against how often it will realistically be used.
Use Labels That Work for Low Vision
Low-vision labels should make categories immediately recognizable without requiring close inspection. Use large, dark lettering on a light background or light lettering on a dark background, choosing whichever contrast is easiest for the individual to see. Plain words such as “Tea,” “Bowls,” “Snacks,” and “Leftovers” are often clearer than decorative fonts, abbreviations, or handwritten script. Place labels consistently on the front edge of shelves, bins, or drawers where they can be seen before the container is opened.
Labels work best when the inside matches the label every time. Avoid a bin marked “Breakfast” that later becomes a catchall for batteries, coupons, and baking supplies. For containers holding dry foods, include the food name and, when useful, a simple date in large print. Tactile markers, such as a raised dot on the correct cabinet pull, can complement visual labels for people with more limited sight. Refresh faded labels promptly, since partially readable labels can be more confusing than none at all.
Reduce Duplicates Without Removing Useful Backups
Duplicates can turn cabinets into obstacle courses, especially when several versions of the same utensil, mug, storage container, or small appliance compete for the front of a shelf. Sort one category at a time and identify what is actively used, what is a sensible backup, and what has no clear purpose. Keep enough dishes and utensils for normal household routines, including visits if those are common, but avoid storing a large collection in the easiest reach zone just because it is available.
Be cautious about discarding items that have personal value or serve a specific adaptive purpose. A caregiver may see five similar spatulas, while the cook may rely on one with a particular handle, weight, or flexibility. Set questionable items aside temporarily rather than making immediate decisions for someone else. If they are not missed after several weeks, they can be relocated or donated according to the household’s wishes. The goal is visible, accessible essentials—not an empty kitchen or a system that feels imposed.
Store Knives and Blades Deliberately
Sharp tools need a storage method that keeps edges covered or secured while still making the intended tool easy to identify. Avoid loose knives in a crowded drawer, where a hand searching for a peeler or spoon can encounter a blade unexpectedly. A stable knife block, a properly mounted magnetic strip positioned away from children and traffic, or a drawer insert with separate slots can work when installed and used correctly. Choose the option that fits the person’s reach, grip, and cleaning routine.
Include smaller cutting hazards in the review: peelers, kitchen shears, box cutters, grater attachments, and replacement blades. Give each one a designated place rather than letting it migrate into an odds-and-ends drawer. Keep protective covers on tools designed to use them, and do not place sharp items in a sink filled with soapy water where they are hard to see. If a person has trouble handling a particular knife safely, consider whether pre-cut ingredients, a different preparation method, or help with that task is more practical than simply moving the knife.
Change One Step Instead of Reorganizing Everything
A full kitchen overhaul can disrupt familiar habits and make a once-confident cook feel less capable. Start with one troublesome action, such as finding a mug, transferring leftovers, opening a can, or reaching a frequently used pan. Make a single change, then let the household use it for several days. This approach makes it easier to tell whether the new location actually saves effort or merely looks tidy. It also limits the frustration of searching through an unfamiliar kitchen after a well-intended rearrangement.
When introducing a new storage place, use a simple cue that connects it to the task. Put tea supplies near the kettle, dish towels where hands are dried, and food-storage lids close to matching containers if that fits the person’s routine. Explain the change once, but avoid repeated correction if the senior returns an item to its former location. That behavior may signal that the old placement is more intuitive. Adjust the system around demonstrated use rather than expecting the user to adapt to an organizer’s preference.
Review the Setup Together After One Week
Schedule a short household review after about a week of ordinary meals, snacks, and cleanup. Ask specific questions: Which cabinet was hard to open? What did you have to search for? Was anything too heavy to move? Did the counter stay clear where food was prepared? Watch for workarounds, such as leaving a frequently used item on the table because its assigned cabinet is inconvenient. These small signs often reveal more than a general question about whether the kitchen feels better.
Use the review to make modest corrections, not to judge how well someone followed the plan. A household may discover that an item needs to move a few inches, that labels are too small, or that a drawer is crowded once utensils are returned after washing. Recheck the arrangement after changes in health, mobility, vision, caregiving schedules, or cooking habits. A senior-friendly kitchen is not a fixed design; it is a practical system that should continue to match the person using it.
Use a Buyer Checklist Before Adding Organizers
Before choosing bins, drawer inserts, shelf risers, carts, or other organizers, measure the available space and consider how the item will be used when full. Check whether it requires bending, lifting, pulling, assembly, or cleaning in narrow corners. A tall pantry bin may create visibility but become too heavy once filled with cans. A rolling cart may add useful storage but become an obstacle in a tight walkway. Favor organizers that improve access to existing essentials instead of adding another layer to manage.
A useful checklist includes: Can the user see what is inside? Can it be reached and returned with one comfortable motion? Does it leave a clear path and stable counter space? Will it hold only lightweight items if it is placed high? Can it be cleaned easily after a spill? Does it fit the household’s established routine? Finally, introduce only a few organizers at once. The best choice is usually the one that makes a daily task simpler without demanding new strength, memory, or maintenance.
Further reading: National Institute on Aging: home safety U.S. Fire Administration: cooking safety.
5. Conclusion
Organizing a kitchen that’s safe and senior-friendly in 2026 doesn’t have to be complicated. With thoughtful layout and the right tools, you can support your loved ones’ independence. Our top pick is the Robotwist Electric Jar Opener for its zero-effort design. Alternatively, the versatile Otstar 5‑in‑1 Jar Opener is compact and affordable. Add in smooth-edge openers and adaptive boards to round out a care-centered kitchen setup.
If you’re thinking about your parents or grandparents, these tools are more than practical—they help preserve dignity, ease, and joy in everyday cooking.
Explore more senior kitchen tools
6. Explore Related Guides
- Best Air Fryers for Seniors
- Easiest Coffee Makers for Older Adults
- How to Install an Under‑Cabinet Jar Opener
Guide created in 2026. Keywords: how to organize, safe, for seniors.