
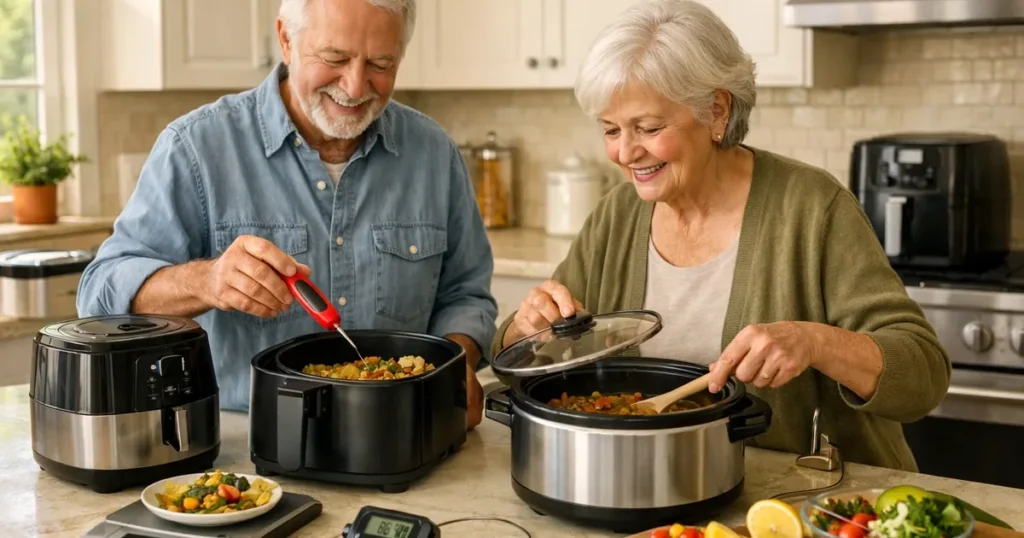
Low-sodium recipes for seniors should start with food you actually want to eat: a warm breakfast, a manageable lunch, and a dinner that does not leave a sink full of heavy pans. The seven recipes below use familiar ingredients, modest portions, and herbs, citrus, or spices for flavor. You can make them with ordinary cookware. Buying an air fryer, pressure cooker, or other appliance is optional.
These are original, research-informed recipe suggestions, not recipes we have laboratory analyzed or documented as kitchen tested. They contain no added table salt when prepared as written, but ingredients naturally contain sodium and packaged products vary. We do not claim that each finished meal meets a formal low-sodium labeling threshold. If you follow a prescribed sodium allowance, use your ingredient labels and portion sizes to calculate the amount in your own meal.
Start with one familiar dish and read the complete method before turning on the heat. Set out ingredients, use a stable cutting surface, and ask for help with hot or heavy cookware when needed. Dietary restrictions, allergies, chewing difficulties, and swallowing problems require individual adaptations; these recipes are not a substitute for a prescribed meal or texture plan.
Seven low-sodium recipes for seniors to cook first
1. Cinnamon apple oatmeal
Servings: 2. Time: About 15 minutes. Equipment: a small saucepan, measuring cup, spoon, and two bowls. This breakfast uses fruit and cinnamon for flavor rather than a flavored instant oatmeal packet. Choose plain rolled oats, not a seasoned or sweetened mix.
Ingredients
- 1 cup plain rolled oats
- 2 cups water, plus a splash if needed
- 1 small apple, cored and finely diced
- 1/2 teaspoon ground cinnamon
- 1/2 teaspoon vanilla extract, optional
- 2 tablespoons chopped unsalted walnuts, optional and only if their texture is appropriate
Method
- Wash and prepare the apple. If chopping is uncomfortable, ask someone to prepare it ahead or choose plain unsweetened applesauce instead. Put the water and apple in a small saucepan.
- Bring to a gentle simmer over medium heat. Add the oats and cinnamon, then lower the heat. Cook for about 5–8 minutes, stirring regularly, until the oats are soft. Follow the oat package timing if it differs.
- Add a little water if the oatmeal thickens before the apple is tender. Stir in vanilla if using. Turn off the heat and let the mixture stand briefly.
- Divide between two bowls. Add walnuts only when safe and comfortable for the eater. Let the oatmeal cool to a comfortable eating temperature before serving.
Sodium note: Plain oats, fruit, and water avoid the added sodium in some instant mixes. Milk, plant drinks, toppings, and substitutes change the total, so check their labels separately.
Make it easier: Measure the dry oats and cinnamon into a labeled container the night before. Keep the saucepan on the stove and ladle the oatmeal into bowls instead of carrying a full hot pan. For a smoother result, cook the apple longer or use applesauce; that does not establish suitability for a prescribed swallowing diet.
2. Soft scrambled eggs with zucchini
Servings: 2. Time: About 15 minutes. Equipment: a bowl, fork, nonstick skillet, and spatula. A small amount of zucchini adds moisture and gives this familiar breakfast a vegetable component without relying on bacon, sausage, or salty cheese.
Ingredients
- 3 large eggs
- 1 tablespoon water
- 1 teaspoon olive oil
- 1/2 cup finely diced zucchini
- 1 tablespoon chopped fresh chives, optional
- 1/8 teaspoon ground black pepper, or to taste
Method
- Crack the eggs into the bowl and beat with the water and pepper. Wash hands and surfaces after handling raw egg. Set the egg mixture close to the stove so you do not need to carry it across the kitchen.
- Warm the oil in the skillet over medium-low heat. Add the zucchini and cook for about 4–6 minutes, stirring, until tender. Add a teaspoon of water if the vegetables begin to stick.
- Pour in the eggs. Use slow, broad strokes to move the mixture across the pan as it sets. Reduce the heat if the bottom starts browning before the top is cooked.
- Continue cooking until the eggs are set and no liquid egg remains. Sprinkle with chives if using, divide onto two plates, and serve promptly. Do not leave the eggs runny merely to keep them soft.
Sodium note: Eggs contain naturally occurring sodium. Leaving out cured meat, cheese, and seasoning salt reduces added sources, but it does not make the dish sodium-free. Bread served alongside contributes its own sodium.
Make it easier: Use a light skillet with a comfortable handle, and have the vegetables cut beforehand. Frozen plain chopped vegetables can help, but thaw or cook off excess water before adding eggs. Keep the handle turned away from the counter edge and serve directly onto plates beside the stove.
3. Lemon white bean and cucumber bowl
Servings: 2. Time: About 10 minutes. Equipment: a colander, bowl, spoon, knife, and cutting board. This no-cook lunch is useful on days when standing at the stove feels tiring. Choose beans labeled no salt added, and check that the label matches the can in your hand.
Ingredients
- 1 can, about 15 ounces, no-salt-added white beans, drained and rinsed
- 1/2 cup finely diced cucumber
- 1/2 cup chopped tomato
- 1 tablespoon olive oil
- 1 tablespoon lemon juice
- 1 tablespoon chopped parsley or 1 teaspoon dried parsley
- Black pepper to taste
Method
- Drain the beans in the colander, rinse under running water, and let excess water drain. Do not assume rinsing removes all sodium. If opening cans is difficult, ask for help or use a suitable opener.
- Wash the cucumber and tomato. Cut them into pieces that are comfortable to eat. Put the beans and vegetables into a bowl with enough room for gentle mixing.
- Combine olive oil, lemon juice, parsley, and pepper in a cup. Pour over the beans and fold everything together carefully so the beans retain some texture.
- Divide between two bowls and serve. For a softer variation, mash some beans with a fork and use peeled cucumber only if appropriate. Refrigerate the unused portion promptly in a covered container.
Sodium note: Bean brands differ. Calculate from the actual label rather than substituting a generic sodium number. Feta, olives, bottled dressing, salted crackers, and bread can add substantial sodium to an otherwise simple bowl.
Make it easier: Choose a bowl that stays still on the counter. Prepare the dressing with a spoon rather than shaking a tight jar that may be difficult to reopen. If raw vegetables are uncomfortable to chew, a warm bowl of tender cooked vegetables and beans may be a better choice, subject to any prescribed texture requirements.
4. Carrot and red lentil soup
Servings: 3. Time: About 35 minutes. Equipment: a medium saucepan with lid, spoon, measuring cup, and ladle. Red lentils soften quickly and help thicken the soup without a salty condensed soup base. This is a stovetop recipe; do not transfer the timing directly to a pressure cooker.
Ingredients
- 1 teaspoon olive oil
- 1/2 small onion, finely chopped
- 1 medium carrot, finely diced
- 3/4 cup dry red lentils, rinsed and inspected
- 3 cups water, plus more as needed
- 1/2 teaspoon ground cumin
- 1/4 teaspoon garlic powder, not garlic salt
- 1 tablespoon lemon juice
Method
- Warm the oil over medium-low heat. Add onion and carrot and cook about 5 minutes, stirring. Add a small splash of water if they stick rather than allowing the vegetables to burn.
- Add the lentils, water, cumin, and garlic powder. Bring to a gentle boil, then reduce to a simmer. Partially cover the pot so steam can escape safely.
- Cook for about 20–25 minutes, stirring occasionally, until the lentils have broken down and the carrot is tender. Add water in small amounts if the soup becomes thicker than you prefer.
- Turn off the heat and stir in the lemon juice. Taste before adding anything else. Ladle into three portions, allowing each bowl to cool to a comfortable temperature. Refrigerate portions intended for later meals promptly.
Sodium note: Water keeps this version independent of broth sodium. If you substitute broth, use the label for the quantity actually added; reduced-sodium broth is not necessarily low in sodium.
Make it easier: Buy plain prechopped onion and carrot if available. Avoid lifting the full pot to pour soup. Use a ladle and small containers instead. There is no need to blend this soup, which avoids handling hot liquid around blender blades. A thick soup still needs individualized assessment for anyone with swallowing difficulties.
5. Lemon herb chicken with zucchini
Servings: 2. Time: About 35 minutes. Equipment: a small roasting pan, mixing bowl, tongs, and food thermometer. Choose plain chicken without an injected broth or seasoning solution; check the ingredients because apparently unseasoned poultry can still contain added sodium.
Ingredients
- 2 small boneless, skinless chicken breasts, about 4 ounces each
- 1 medium zucchini, sliced
- 1 tablespoon olive oil
- 1 tablespoon lemon juice
- 1/2 teaspoon dried oregano
- 1/4 teaspoon garlic powder
- Black pepper to taste
Method
- Heat the oven to 400°F. Place the chicken and zucchini in the roasting pan in a single layer. Keep raw poultry and its utensils separate from ready-to-eat foods; do not rinse raw chicken.
- Mix olive oil, lemon juice, oregano, garlic powder, and pepper. Spoon over the chicken and vegetables. Use clean utensils when handling cooked food later.
- Roast for about 20–25 minutes as a starting estimate. Thickness and ovens vary. Check the thickest part of each breast with a food thermometer and continue cooking until it reaches 165°F.
- Use oven mitts and a stable heat-safe resting place for the pan. Divide chicken and vegetables between two plates. Do not use color or clear juices as a substitute for a temperature reading.
Sodium note: Plain herbs and lemon add flavor without seasoning salt. The chicken label matters more than the absence of a salt shaker. Bottled marinades, brined poultry, and premixed spice blends require separate checking.
Make it easier: Ask the butcher or a family member to portion the chicken so you do not have to cut raw meat. Choose a small pan that fits comfortably in the oven, and get help if moving it feels awkward. This method uses a conventional oven; an air fryer requires its own instructions and temperature verification.
6. Baked fish with tomato and dill
Servings: 2. Time: About 25 minutes. Equipment: a small baking dish, spoon, and food thermometer. Plain frozen fish can be convenient, provided it is thawed safely and does not come in a salty sauce or seasoned coating.
Ingredients
- 2 plain white-fish fillets, about 4 ounces each, thawed if frozen
- 1 cup chopped fresh tomatoes
- 2 teaspoons olive oil
- 1 tablespoon lemon juice
- 1/2 teaspoon dried dill or 1 tablespoon fresh dill
- Black pepper to taste
Method
- Heat the oven to 400°F. Check the fish for bones and place in a lightly oiled baking dish. Wash hands and utensils after touching raw fish.
- Mix tomatoes, the remaining olive oil, lemon juice, dill, and pepper. Spoon around and over the fillets without piling everything into a thick mound.
- Bake for about 12–18 minutes as a starting estimate, depending on thickness. Check with a food thermometer and continue until the thickest part reaches 145°F.
- Set the hot dish on a stable heat-safe surface. Portion onto plates and check again for bones before eating. Serve with a small portion of plain rice or another side compatible with your meal plan.
Sodium note: Fresh tomato avoids dependence on a prepared sauce. If using canned tomato, choose no salt added and check its label. Smoked fish, breaded fillets, seasoning packets, and brined seafood are different products and should not be treated as equivalent substitutions.
Make it easier: Thaw frozen fish in the refrigerator in a covered container that prevents drips onto other foods. Buy smaller portions that fit the baking dish without folding. Keep a clean plate and serving spoon beside the oven so you can portion the meal without carrying the hot dish to the dining table.
7. One-pan vegetable and brown rice bowl
Servings: 2. Time: About 20 minutes using freshly cooked rice, or properly refrigerated cooked rice. Equipment: a skillet with lid and a spoon. This bowl uses plain vegetables and a simple lemon dressing instead of soy sauce or a packaged stir-fry sauce.
Ingredients
- 1 1/2 cups cooked plain brown rice
- 1 cup plain frozen mixed vegetables, without sauce or seasoning
- 1/2 cup no-salt-added chickpeas, drained and rinsed
- 2 teaspoons olive oil
- 2 tablespoons water, plus more if needed
- 1 tablespoon lemon juice
- 1/4 teaspoon garlic powder and black pepper to taste
Method
- Warm the olive oil in the skillet over medium heat. Add the vegetables and water. Cover and cook according to the vegetable package directions, stirring occasionally.
- Add the rice, chickpeas, garlic powder, and pepper. Break up clumps gently with the spoon. Add a splash of water if the mixture sticks, and cover loosely to help it heat through.
- Stir so the center and edges heat evenly. If using refrigerated cooked rice or other leftovers, check several places with a food thermometer and reheat to 165°F.
- Turn off the heat, stir in lemon juice, and divide into two bowls. Serve promptly. Keep any remaining portion refrigerated rather than leaving the skillet on the counter for grazing.
Sodium note: Plain frozen vegetables and unseasoned rice help control added sodium. Microwave rice pouches and canned chickpeas vary considerably; read the actual label even when the front of the package looks simple.
Make it easier: Cook rice ahead only if you can cool and refrigerate it promptly in shallow containers. Use a small portion rather than repeatedly reheating a large batch. A light pan and a broad spoon can be easier to manage than a deep, heavy wok. You do not need a rice cooker to make this meal.
How to adapt the meals to your sodium plan
Choose one breakfast and one lunch or dinner first. Write down the ingredients you already have, then buy only what is missing. For packaged ingredients, compare the same serving size and look at sodium in milligrams. Multiply by the number of servings you actually use. A label that looks low per spoonful can contribute much more when several spoonfuls go into a recipe.
No salt added does not mean sodium-free. Reduced sodium is a comparison with another product, not a guarantee that it fits a particular daily allowance. Use FDA guidance on sodium labels to understand the terms. Calculate the full batch from your ingredient labels or a reliable food-composition database, then divide by the actual portions. We omit numerical sodium estimates because the specific brands and final yields have not been analyzed.
Herbs, garlic powder, citrus, and vinegar can provide different flavors without automatically adding salt. Check mixed seasonings for salt, and distinguish garlic powder from garlic salt. Do not automatically use potassium-based salt substitutes if you have kidney disease, take medicines affecting potassium, or have been told to limit potassium; ask your clinician or pharmacist. The NHLBI practical DASH guide offers additional ideas for shopping and seasoning.
Storage, reheating, and a manageable kitchen routine
Refrigerate perishable food within two hours, or within one hour when the surrounding temperature exceeds 90°F. Use shallow containers so leftovers cool efficiently, keep the refrigerator at 40°F or below, and generally use refrigerated leftovers within three to four days. Freeze portions you will not use in that window. Label containers with the meal and date, and reheat leftovers to 165°F.
Follow FoodSafety.gov temperature guidance and USDA leftover handling guidance. Cooking times in the recipes are estimates, not proof of doneness. A thermometer measures food temperature; it does not measure sodium. Avoid using a body thermometer for cooking.
For easier preparation, set out a stable board, a comfortable knife, and ingredients before heating cookware. Choose prechopped plain vegetables when they reduce effort. Keep frequently used items within easy reach, use dry oven mitts, and portion food beside the stove. Our senior kitchen safety checklist can help you review the work area.
Optional tools for preparation and temperature checks
The recipes above use ordinary cookware. These existing recommendations are optional alternatives; appliances do not remove sodium from ingredients. Compare the handling and cleanup requirements before buying.
- Ninja AF101 4-Quart Air Fryer: 🛒 Check Price on Amazon
- Instant Pot Duo 6-Quart: 🛒 Check Price on Amazon
- Hamilton Beach 4-Quart Slow Cooker: 🛒 Check Price on Amazon
- TempPro TempTrack Cooking Thermometer: 🛒 Check Price on Amazon
- Etekcity Digital Kitchen Scale: 🛒 Check Price on Amazon
- TempPro TempSwift Instant-Read Thermometer: 🛒 Check Price on Amazon
- COSORI TurboBlaze 6-Quart: 🛒 Check Price on Amazon
Specifications and cleaning comparison
Manufacturer information where confirmed. Missing specifications remain unverified; do not assume a similar model has the same measurements. Handling observations are editorial considerations, not hands-on test results.
| Product | Weight | Dimensions | Controls | Cleaning and handling limitations |
|---|---|---|---|---|
| Ninja AF101 4-Quart Air Fryer | 10.6 lb Source | 13.6 D x 11 W x 13.3 H inches Source | Digital touch controls; four cooking programs. Source | Basket and crisper plate are dishwasher-safe; wipe the exterior. Handling consideration: the basket still needs lifting. Source |
| Instant Pot Duo 6-Quart | 14.6 lb Source | 12.2 D x 13.38 W x 12.48 H inches Source | Push-button programs and steam-release control. Source | Lid and inner pot are dishwasher-safe. Handling consideration: cleaning also involves lid components and a full pot is heavier. Source |
| Hamilton Beach 4-Quart Slow Cooker | Not verified for this exact model. Listing weight is implausible; do not rely on it. | 9.2 D x 13.9 W x 9.2 H inches Source | Manual dial: Low, High and Keep Warm. Source | Stoneware crock and glass lid are dishwasher-safe. Handling consideration: lift the crock separately after cooling. Source |
| TempPro TempTrack Cooking Thermometer | 3.4 oz Source | Not verified for this exact model. Full device dimensions were not confirmed. | Programmable temperature alert and timer; separate wired food probe. Source | Wipe-clean care listed. Handling consideration: the cable and probe need attention after food contact; keep the base out of the oven. Source |
| Etekcity Digital Kitchen Scale | 200 g Source | 7.3 x 5.7 x 0.6 inches (listing order) Source | Unit selection and tare function with backlit LCD. Source | Wipe the stainless surface. Handling consideration: clear spills around the platform; this is not a sodium analyzer. Source |
| TempPro TempSwift Instant-Read Thermometer | Not verified for this exact model. Retrieved listings conflict on weight. | Not verified for this exact model. Full dimensions were not confirmed. | Button-released folding probe and backlight/power button. Source | Hand-wash care listed. Handling consideration: clean the food-contact probe; confirm water-resistance limits in the supplied manual. Source |
| COSORI TurboBlaze 6-Quart | 13.2 lb Source | 14.4 D x 11.8 W x 11.9 H inches, including handle Source | Digital panel with nine cooking functions. Source | Basket and crisper plate are dishwasher-safe; cool before cleaning. Handling consideration: large basket and hot surfaces need care. Source |
Frequently asked questions
Do I need special appliances for these recipes?
No. The methods use ordinary pans, an oven, and basic utensils. A food thermometer is useful for checking meat, fish, and reheated food. Choose additional equipment only when it solves a real difficulty in your routine.
Why are there no exact sodium numbers?
Brands, ingredients, substitutions, and portion sizes change the total. These recipes have not undergone nutritional analysis. An unsupported number would be less useful than a transparent method: add the sodium from each actual ingredient and divide by the number of portions.
Can I use broth instead of water?
Yes, where it suits the recipe, but check the sodium for the amount used. No-salt-added broth and reduced-sodium broth are not interchangeable claims. Changing the liquid also changes the nutritional calculation.
Are these meals suitable for every older adult?
No single menu fits everyone. Allergies, kidney disease, diabetes, prescribed sodium or fluid limits, and swallowing difficulties can change ingredient and texture needs. Use your individual care plan when adapting the recipes.
Can I cook one portion instead of two?
Halve ingredients where practical, but do not assume the cooking time halves. Use appropriately sized cookware, check texture and temperature, and store opened packaged ingredients according to their labels.
Begin with the meal that feels easiest, then repeat it with a small flavor change. A dependable cooking routine and clearly labeled ingredients matter more than a long list of appliances. Use optional tools to reduce effort while keeping the recipes themselves at the center of the meal.