
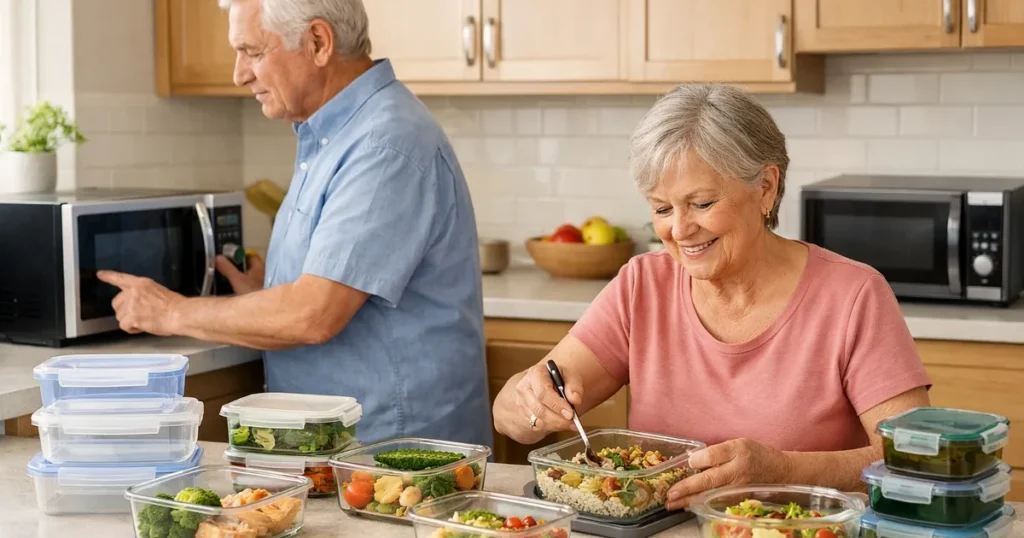
A weekly meal plan using only a microwave can be built around ordinary food: oats, potatoes, vegetables, beans, ready-cooked grains, and small portions of cooked protein. This seven-day plan is for one person and uses the microwave as the only cooking appliance. A refrigerator is required, and a freezer is useful for later-week portions. Cold breakfasts and sandwiches are included so every meal does not require heating.
This article contains affiliate links. As an Amazon Associate I earn from qualifying purchases.
These are suggested home-cooking recipes, not a prescribed diet or laboratory-tested cooking program. Adjust portions to appetite and any advice from your clinician or dietitian. Timings are starting estimates: food quantity, starting temperature, dish shape, and microwave wattage change the result. Package instructions take priority for packaged food.
Seven-day microwave meal plan for one person
Choose either chicken or beans for the meals below; you do not need to buy every alternative. Lunch and dinner portions can be exchanged to match your schedule. The recipe numbers refer to the instructions further down the page. Fruit, yogurt, milk, and other cold sides need no cooking appliance.
| Day | Breakfast | Lunch | Dinner |
|---|---|---|---|
| Monday | Apple oatmeal, recipe 1 | Chickpea and tomato bowl, recipe 3, with bread | Chicken or bean rice bowl, recipe 4 |
| Tuesday | Yogurt, banana, and oats, recipe 2 | Loaded potato, recipe 5 | Broccoli and rice with cheese, recipe 6 |
| Wednesday | Apple oatmeal, recipe 1 | Tuna and white bean sandwich, recipe 7 | Tomato lentil soup, recipe 8, with bread |
| Thursday | Yogurt, banana, and oats, recipe 2 | Freshly assembled chickpea bowl, recipe 3 | Sweet potato and black beans, recipe 9 |
| Friday | Apple oatmeal, recipe 1 | Chicken or bean rice bowl, recipe 4 | Broccoli and rice with cheese, recipe 6 |
| Saturday | Yogurt, banana, and oats, recipe 2 | Loaded potato, recipe 5 | Tomato lentil soup, recipe 8 |
| Sunday | Apple oatmeal, recipe 1 | Tuna and white bean sandwich, recipe 7 | Sweet potato and black beans, recipe 9; cinnamon pear, recipe 10, if wanted |
Shopping list and portion planning
This list supports the menu above for one person. It is an approximate shopping guide, not a calorie or nutrient calculation. Start by checking the refrigerator and cupboard, then cross out food you already have. Buy smaller packs when opening a large pack would create waste.
- Breakfast: about 3 cups rolled oats, four small apples, three bananas, three individual plain yogurts, and milk or a suitable fortified alternative if you prefer it to water.
- Vegetables and fruit: two medium white potatoes, two medium sweet potatoes, one pear, and approximately six cups of frozen broccoli or mixed vegetables. Choose a bag that can be resealed.
- Grains: four single-serving ready-cooked rice portions, plus enough bread for sandwiches and soup. Freeze spare bread in separated slices.
- Beans and lentils: two small cans or pouches of chickpeas, two portions each of white and black beans, and two portions of ready-cooked lentils. Use the recipe quantities to compare package sizes.
- Protein and dairy: two small tuna pouches or cans, optional cooked chicken for two bowls, a small block of cheese, and a little plain yogurt for toppings. Choose beans instead of chicken if preferred.
- Flavorings: two small cartons or cans of chopped tomatoes, a lemon, olive oil, cinnamon, dried mixed herbs, and optional cumin or paprika. Choose no-salt-added or lower-sodium versions where suitable.
The menu deliberately repeats ingredients. One yogurt can flavor a potato topping as well as breakfast; one bag of frozen vegetables can serve several different dinners. For shopping, count the number of portions you will actually eat at home. If you expect to eat out on Friday, remove that day’s ingredients before buying them.
Set up the counter before cooking
You need a microwave-safe bowl with room above the food, a microwave-safe plate or vented cover, a spoon, a measuring cup, dry oven mitts, and a food thermometer for reheated meals. Use a bowl that fits securely on the turntable. A shallow dish can make stirring easier, while a deep oversized bowl helps contain oatmeal as it bubbles.
Read the microwave’s wattage on its label or manual. The estimates below assume an ordinary household microwave around 800–1000 watts. A lower-powered unit usually needs longer. Begin with the shorter suggested time, stir as directed, and add short intervals when necessary. Do not assume that a hotter bowl means the center of the food is ready.
Keep a clear space immediately beside the microwave for the hot dish. Put the spoon, seasoning, and serving plate there before starting. If reaching into an over-the-range microwave is uncomfortable, ask someone to help with the hot dish; a recipe cannot compensate for an unsafe lifting position. Use pre-cut produce when chopping is difficult.
Food storage and reheating rules for this plan
USDA guidance is to refrigerate perishable leftovers promptly, within two hours, or one hour above 90°F. Use refrigerated leftovers within three to four days and reheat them to 165°F. Divide large amounts into shallow containers. Cover food with a vent for steam, stir or rotate during microwave heating, allow the recommended standing time, and check several places with a food thermometer. Keep the refrigerator at 40°F or below.
For this menu, freeze Friday-to-Sunday portions when you prepare them, or open fresh packages later in the week. Do not keep Monday’s cooked chicken or rice in the refrigerator until Sunday. Thaw frozen portions in the refrigerator, or use the microwave defrost setting and heat immediately. Label containers with the food and preparation date. See the USDA leftovers guide.
Use containers labeled microwave-safe, vent lids, and keep metal out unless the appliance manual explicitly permits a particular accessory. Open covers away from your face and hands. Follow the standing time on packaged food. The USDA microwave guide explains why even heating and temperature checks matter. This plan uses cooked proteins; it does not ask you to microwave raw meat.
Ten practical recipes and meal components
1. Apple and cinnamon oatmeal
Serves: one. Ingredients: ½ cup rolled oats, 1 cup water or milk, ½ to 1 small apple finely chopped, and a pinch of cinnamon. An optional spoonful of plain yogurt can be added after cooking.
- Put the oats, liquid, apple, and cinnamon in a large microwave-safe bowl. Leave plenty of empty space above the mixture.
- Microwave for about two minutes, stop, and stir carefully. Continue in 30-second bursts until the oats are soft and the apple suits your preference; this may take another one to two minutes. Watch for bubbling rather than leaving the kitchen.
- Rest for two minutes. Stir again and add a little more liquid if it has thickened too much. Let it cool to a comfortable eating temperature before adding yogurt.
For less chopping, use a small portion of unsweetened applesauce instead of fresh apple. Add it after the oats cook. Different oats need different liquid amounts, so follow the packet if it differs. Make one portion at a time to reduce bowl size and cleanup.
2. Cold yogurt, banana, and oat bowl
Serves: one. Ingredients: one individual plain yogurt, one small banana, and ¼ cup rolled oats. Optional additions are cinnamon or a spoonful of smooth nut butter if appropriate for your allergies and eating needs.
- Spoon the yogurt into a bowl and stir in the oats. Add a splash of milk if you prefer a softer mixture.
- Slice or mash the banana and mix it through. For softer oats, prepare the yogurt-and-oat mixture the evening before, cover, and refrigerate; add banana in the morning.
- Eat cold. Keep remaining yogurt refrigerated and follow the package’s storage instructions.
This is the no-heating breakfast option on the plan. It can be useful on a busy morning or when you want fewer hot dishes to handle. Choose plain yogurt and add fruit to taste instead of assuming every flavored yogurt has the same ingredients. Swap banana for soft fruit you already enjoy.
3. Chickpea and tomato lunch bowl
Serves: one. Ingredients: ½ cup drained cooked chickpeas, ½ cup canned chopped tomatoes, ½ cup frozen mixed vegetables, two tablespoons water, one teaspoon olive oil, and a pinch of dried herbs.
- Combine everything except the oil in a microwave-safe bowl. Cover loosely with a microwave-safe plate or vented lid.
- Heat for two minutes, stir from the outside toward the center, and continue in 30-second intervals until the vegetables are cooked and the mixture reaches 165°F throughout. Allow a brief standing time and check more than one spot.
- Stir in the oil, taste, and serve with bread. Mash some chickpeas with a fork if you prefer a less chunky bowl.
Drain and rinse canned chickpeas before measuring them. If the tomatoes are thick, another spoonful of water helps the mixture heat without drying around the edge. Thursday’s serving should use a fresh package or a portion that was promptly frozen; it is not a reason to leave an open can in the refrigerator for the whole week.
4. Chicken or bean rice bowl
Serves: one. Ingredients: ¾ cup ready-cooked rice, ½ cup frozen vegetables, ½ cup chopped fully cooked chicken or drained cooked beans, two tablespoons water, and optional lemon juice.
- Check the rice packet for its heating instructions. Put rice, vegetables, water, and cooked chicken or beans in a microwave-safe bowl and cover with a vent.
- Heat for two minutes, stir thoroughly, and continue in short intervals. Check the rice and protein in several places after standing; the reheated meal must reach 165°F.
- Add lemon juice to taste and loosen with another spoonful of water if needed. Serve from the same bowl once it can be handled comfortably.
Use clearly labeled, fully cooked chicken, not raw chicken pieces. If buying a larger cooked chicken portion, separate and freeze the later-week share promptly. For a vegetarian version, beans are a direct practical swap. Avoid reheating the entire week’s supply each time you need one lunch.
5. Loaded microwave potato
Serves: one. Ingredients: one medium potato, ½ cup cooked beans or cooked vegetables, two tablespoons grated cheese, and a spoonful of plain yogurt if wanted.
- Scrub the potato and pierce its skin several times with a fork. Place on a microwave-safe plate without foil.
- Heat for three minutes, turn carefully, then continue for two to four minutes until a fork enters easily. Size changes the time considerably. Let it stand for two minutes.
- Heat the beans or cooked vegetables separately in a covered, vented bowl, stirring and checking for 165°F when reheating. Split the potato carefully and add the hot topping and cheese.
Steam can escape quickly when you cut the potato, so keep your face back and use utensils to open it. A very large baking potato is harder to turn and may be more food than you want. A medium potato plus a small topping is easier to portion. Add the yogurt after heating.
6. Broccoli rice with cheese
Serves: one. Ingredients: ¾ cup ready-cooked rice, one cup small frozen broccoli florets, three tablespoons water, and ¼ cup grated cheese. Add ¼ cup cooked beans if you want a larger meal.
- Put broccoli and water in a covered microwave-safe bowl. Cook according to the vegetable package, stopping to stir as directed.
- Add rice and any beans. Stir, cover with a vent, and heat in one-minute intervals until the meal is evenly hot; use the reheating temperature check described above.
- Stir in the cheese after heating so it melts into the rice. Rest briefly and stir once more before eating.
Small florets mix more evenly than large frozen clumps. Break apart clumps with a spoon after the first heating interval, not with your fingers. If cheese sticks to the bowl, soak it once cool rather than scrubbing aggressively. The same method works with peas or another frozen vegetable, using that package’s cooking instructions.
7. Tuna and white bean sandwich
Serves: one. Ingredients: one small tuna pouch or can, about ¼ cup drained cooked white beans, one tablespoon plain yogurt, a squeeze of lemon, and two slices of bread.
- Drain the tuna if necessary. Mash the beans in a bowl with the yogurt and lemon.
- Stir in the tuna, breaking up large pieces with a fork. Spread onto bread and serve straight away.
- Refrigerate any unused perishable ingredients promptly in clean covered containers, following their package instructions.
No microwave heating is needed for this meal. Use a fresh small tuna package on each sandwich day rather than carrying Wednesday’s prepared sandwich through to Sunday. If fish is unsuitable, increase the beans and season to taste. Soft bread avoids the need for a toaster, while a bowl version avoids assembling a sandwich altogether.
8. Tomato and lentil soup
Serves: one. Ingredients: ½ cup ready-cooked lentils, ½ cup chopped canned tomatoes, ½ cup water or lower-sodium broth, ½ cup frozen vegetables, and a pinch of dried herbs.
- Combine the ingredients in a large microwave-safe bowl. Use cooked lentils; dry lentils require a different method.
- Cover with a vent. Heat for two minutes, stir, and continue in 30-second intervals until the vegetables are done and the soup is heated evenly. Bring reheated soup to a rolling boil and stir carefully.
- Let it stand before uncovering away from your face. Adjust thickness with a little water and serve with bread.
This soup can be thick or brothy depending on preference. Mash a few lentils with the back of a spoon for a thicker result, or use less tomato if you prefer a milder flavor. For Saturday, open a new portion or use one frozen promptly after preparation. A lidded bowl is useful for storage but must be vented when heated.
9. Sweet potato with black beans
Serves: one. Ingredients: one medium sweet potato, ½ cup drained cooked black beans, two tablespoons chopped tomatoes, a pinch of cumin if liked, and optional plain yogurt.
- Scrub and pierce the sweet potato. Place on a microwave-safe plate and cook for three minutes. Turn carefully and cook in one-minute intervals until tender, then rest for two minutes.
- Mix beans, tomatoes, cumin, and a spoonful of water in a separate bowl. Cover with a vent and heat, stirring at intervals, until evenly heated to 165°F.
- Open the potato with utensils, add the beans, and finish with yogurt after heating.
The skin and plate can both be hot. If a whole potato is awkward to open, scoop the cooked flesh into a bowl with a spoon, then add the topping. Choose similar-sized potatoes for the two dinners, but still check tenderness each time. Do not use a fixed timer as the only doneness check.
10. Cinnamon pear for a small dessert
Serves: one. Ingredients: one ripe pear, one tablespoon water, a pinch of cinnamon, and an optional spoonful of yogurt.
- Wash the pear, remove the core, and cut the fruit into bite-size pieces. Put it in a small microwave-safe bowl with water and cinnamon.
- Cover with a vent and heat for one minute. Stir and continue in 20-second intervals until the fruit is as soft as you like.
- Allow to cool slightly before serving. Add yogurt after heating, or eat the fruit on its own.
A ripe pear needs less cooking than a firm one. Check it early to avoid turning the fruit into a paste. This recipe is an optional extra, not a requirement to finish a meal. Unsweetened canned pears can be served cold when you would rather skip peeling and heating.
A simple midweek reset
On Wednesday evening, check what remains before preparing Thursday’s meals. Move a clearly dated frozen portion to the refrigerator if it will be needed the next day. Check bread, yogurt, and fruit, and replace only what is missing. Keep the written plan near the fridge so ingredients intended for later meals are not forgotten.
On Friday, make a fresh rice portion or use the previously frozen serving according to its heating instructions. The weekend meals repeat familiar steps, but they should use fresh or properly stored ingredients. Repetition reduces decisions; it does not extend food storage times.
Adjust the plan to your kitchen
For two people, prepare two portions and preferably heat them in separate bowls. Doubling the ingredients does not mean simply doubling the microwave time. If heating a larger dish, stir thoroughly and check the center and edges. Choose bowls each person can lift, rather than one large container that becomes cumbersome.
If standing is tiring, measure cold ingredients at a seated work surface and move them to the microwave before heating. Pre-cut vegetables, pull-tab cans, small pouches, and prepared grains can reduce preparation steps. Choose packaging you can actually open. A container with an excellent seal is unhelpful if its latches are too stiff for your hands.
If sodium is a concern, compare labels on broth, canned beans, tuna, cheese, and prepared rice. Select appropriate portions and add lemon, herbs, or spices to taste. See our low-sodium recipe ideas for more ingredient-based options. A microwave or kitchen scale cannot determine the sodium in a prepared meal.
Optional equipment already featured in this guide
You can use a microwave you already own if it works properly and fits your dishes. The original seven product links are retained below as optional shopping references. No purchase is needed to follow the menu. Check the exact model, usable interior space, control layout, ventilation requirements, and permitted container uses before choosing a replacement.
Rubbermaid TakeAlongs Deep Square Food Storage Containers
Pyrex Simply Store 9-Piece Glass Food Storage Set
Toshiba EM131A5C-BS 1.2-Cubic-Foot Countertop Microwave
COMFEE’ EM720CPL-PMB 0.7-Cubic-Foot Countertop Microwave
Breville Compact Wave Soft Close Microwave (BMO650SIL)
COMFEE’ Retro 0.9-Cubic-Foot Microwave Oven
Chefman 1.1-Cubic-Foot Countertop Microwave Oven
Frequently asked questions
Can every meal be hot?
Yes, but cold meals are included to reduce repeated lifting and preparation. Replace a cold lunch with one of the hot recipes using fresh or properly stored ingredients. There is no need to heat yogurt or a tuna sandwich just because the overall plan uses a microwave.
Can I prepare all seven days on Sunday?
You can organize ingredients and freeze suitable portions, but do not refrigerate a whole week’s cooked meals as one batch. Follow the storage rules above and leave some meals for fresh preparation. The plan is designed around small batches and a midweek check.
What if I do not have a freezer?
Buy smaller packs and prepare meals in short batches. Use shelf-stable unopened pouches for later days, then refrigerate promptly after opening. Check each label. Replace a recipe if its remaining ingredients cannot be used safely within the permitted storage time.